> For the complete documentation index, see [llms.txt](https://docs.centousapps.com/insureful/llms.txt). Markdown versions of documentation pages are available by appending `.md` to page URLs; this page is available as [Markdown](https://docs.centousapps.com/insureful/app-set-up/email-templates/set-up-klaviyo-x-insureful.md).
# Set up klaviyo x Insureful
We can learn about how to set up Klaviyo.
#### Note: You cannot enable both templates at the same time; you can either select in-app templates or Klaviyo templates.
#### Step 1: Go to the Insureful app and click on Email Templates.
These are the in-app templates, which you can get by default.
#### **Step 2: Connect with Klaviyo.**
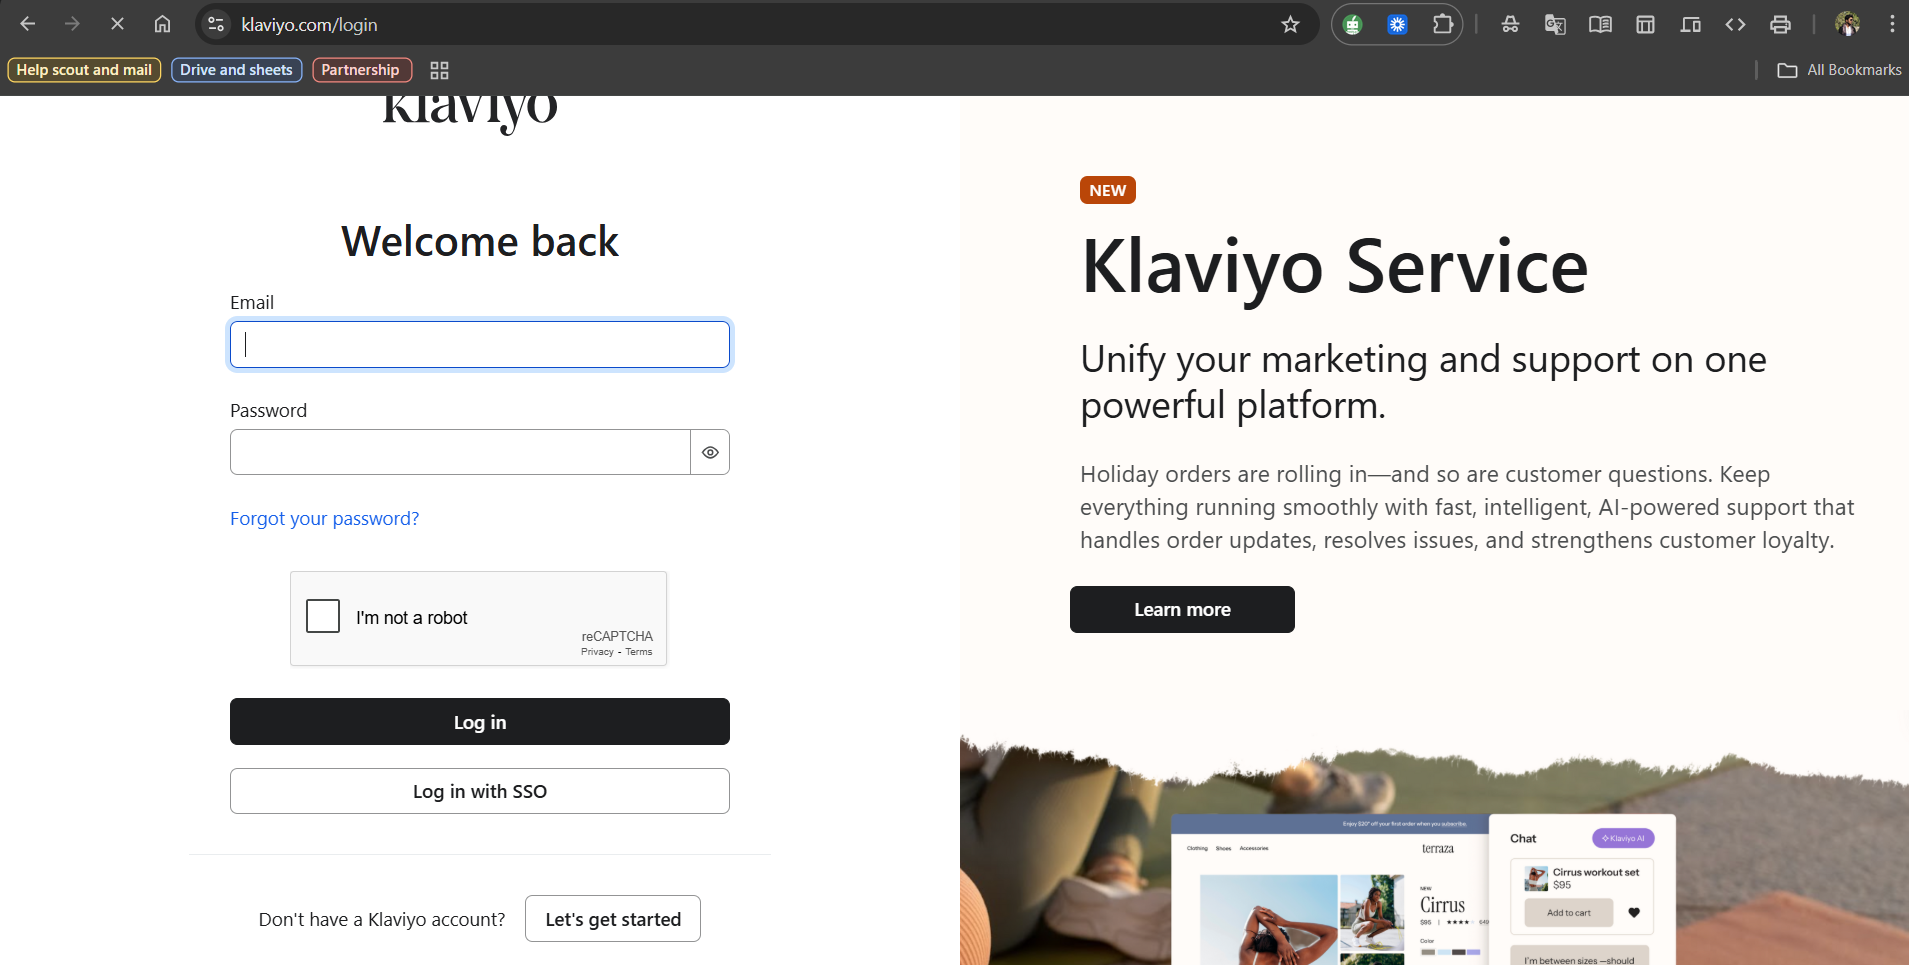
#### **Step 3: Log in to Klaviyo.**
* Go to the Klaviyo site and log in with your email and register your store.
#### **Step 4: Build the API key.**
* Go to settings and then go to API keys.
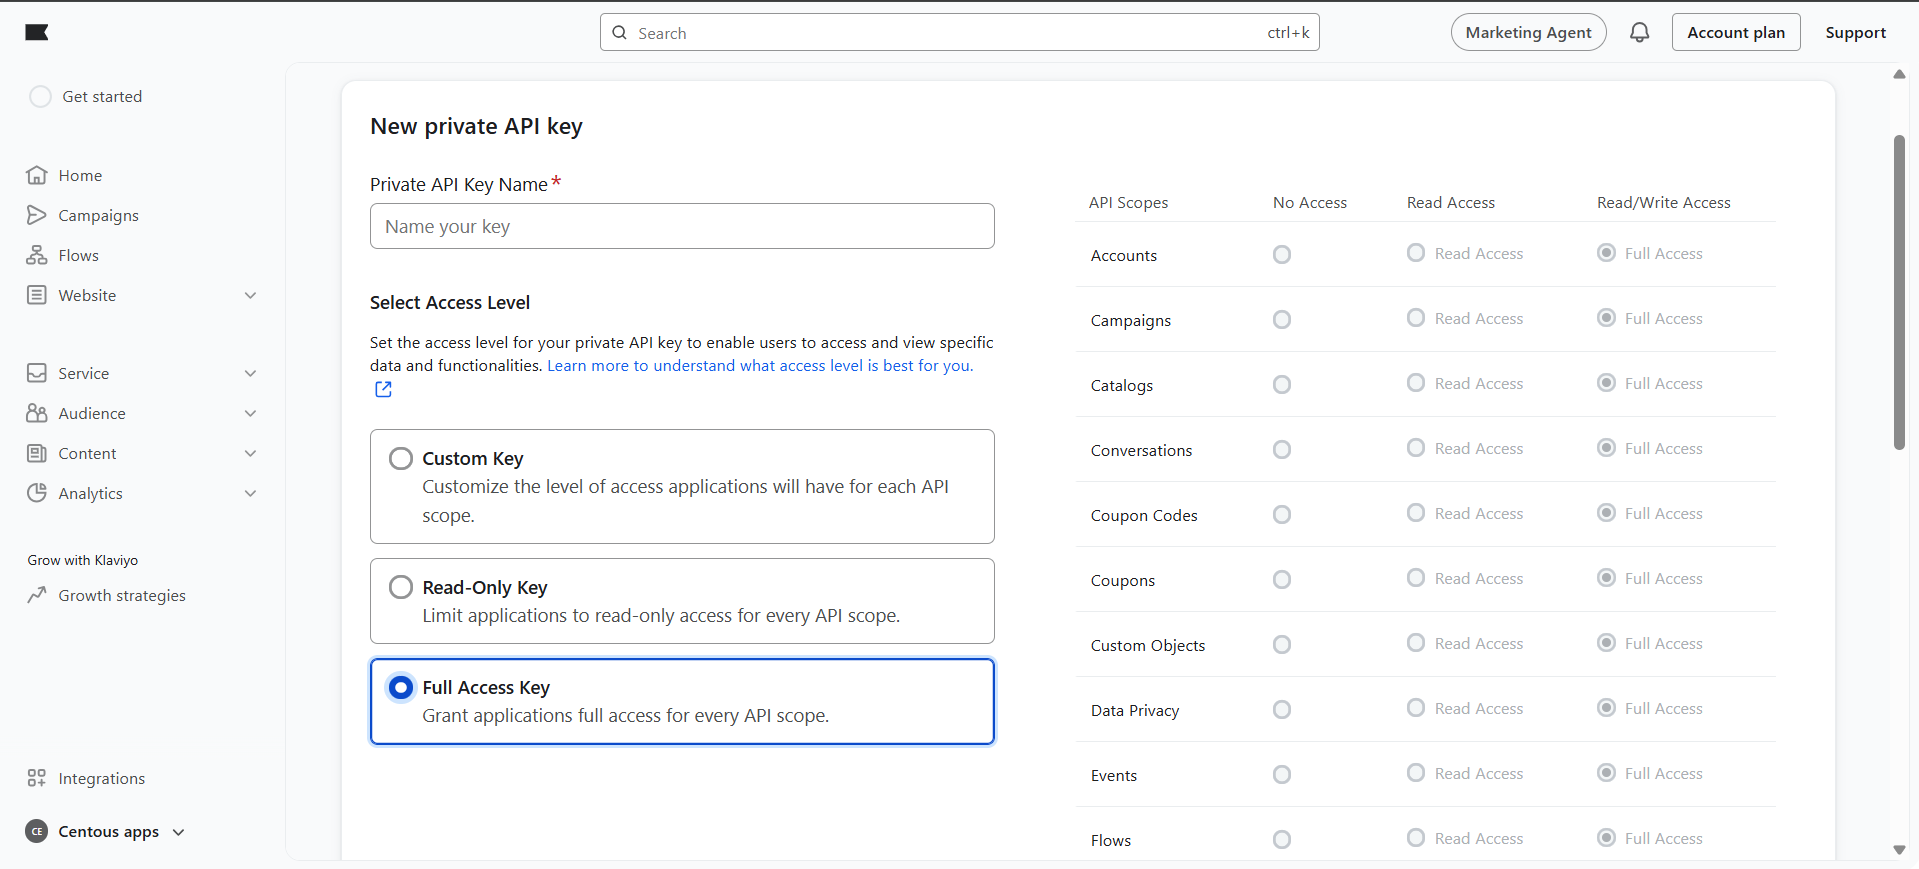
#### **Step 5: Create private API keys.**
* Name your API key.
* Click on the Full Access key.
#### **Step 6: Copy your private key and paste it in the Insureful app's email template section.**
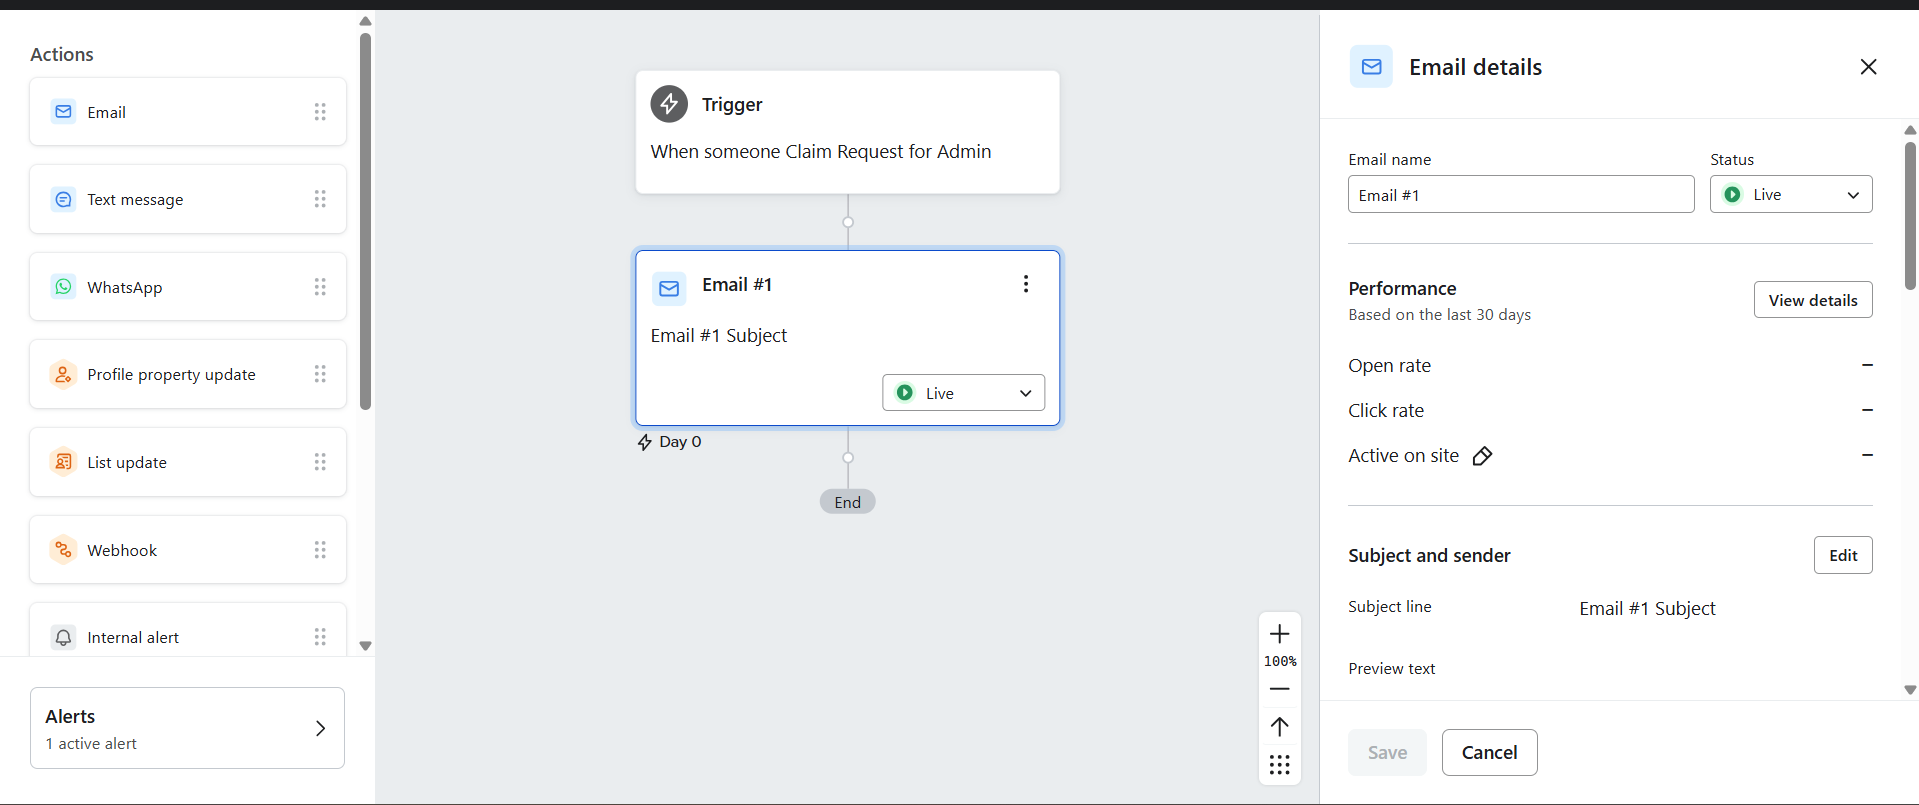
#### **Step 7: Now create a flow.**
* Click on build your own. (You will get direct build-your-own if you are a new user.)
#### **Step 8: Name the flow.**
* Click on the create flow.
#### **Step 9: Go to your matrix and select your API.**
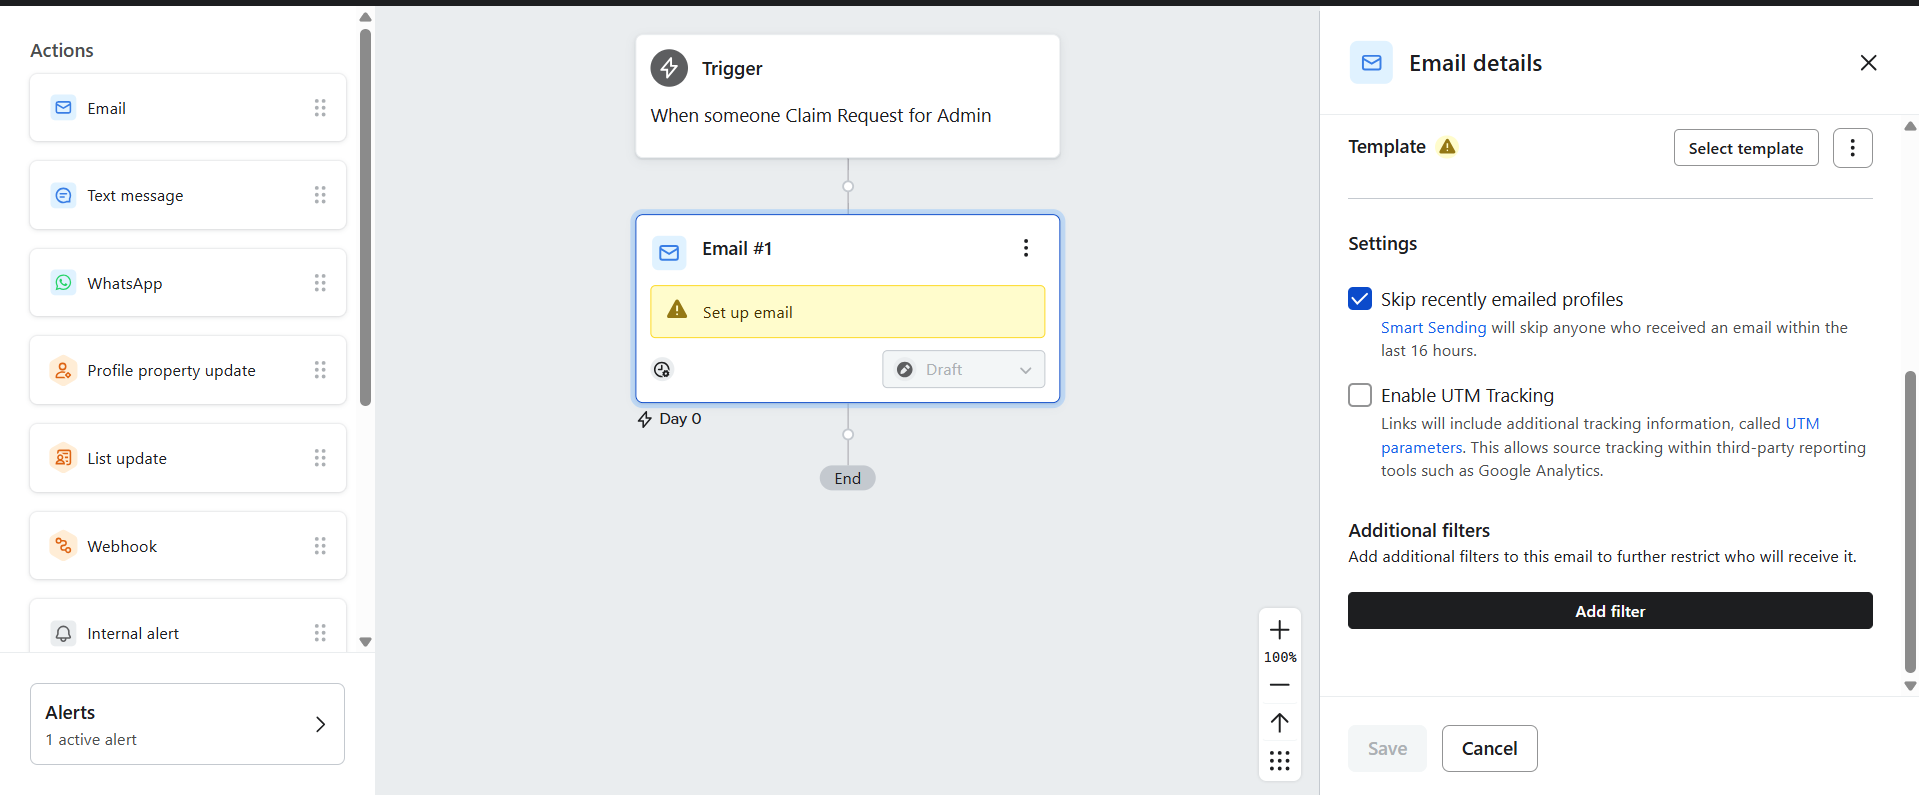
#### **Step 10: In the flow, attach the email from the actions.**
* You can drag and drop from the left in your flow as your email action.
#### **Step 11: Set up the email.**
* Click on the Skip recently emailed profiles.
* After clicking that, the receiver does not get continuous mail. If you want to give constant mail daily, then check that button.
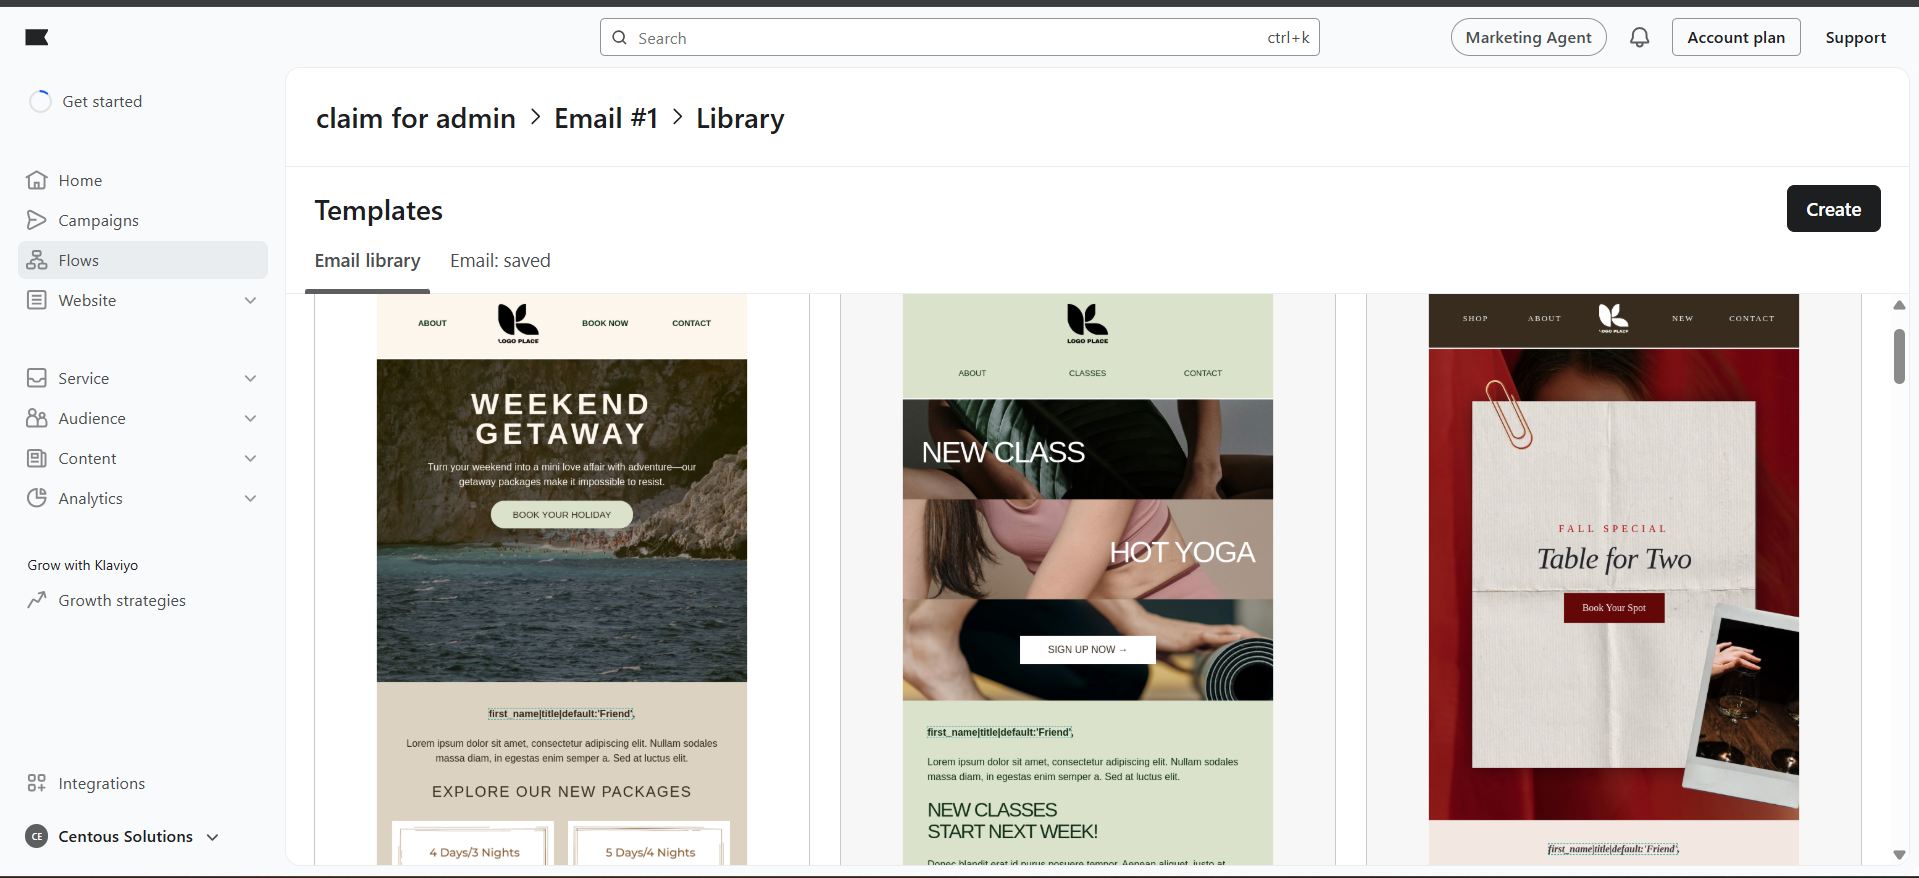
#### **Step 12: Select the template.**
* You can select default templates given by Klaviyo.
* If you want to build your own, you can create that too.
* If you want to create your own, you can do it too.
* You can edit your template from here and fully customize it.
#### **Step 13: Select and save.**
* After selecting the template, click on save.
* You can also set the email name to static or dynamic.
Here are the parameters that you need to set up.
* {{event.customer\_name}}
* {{event.order\_no}}
* {{event.status}}
* {{event.subject}}
After doing every setup, click on save.
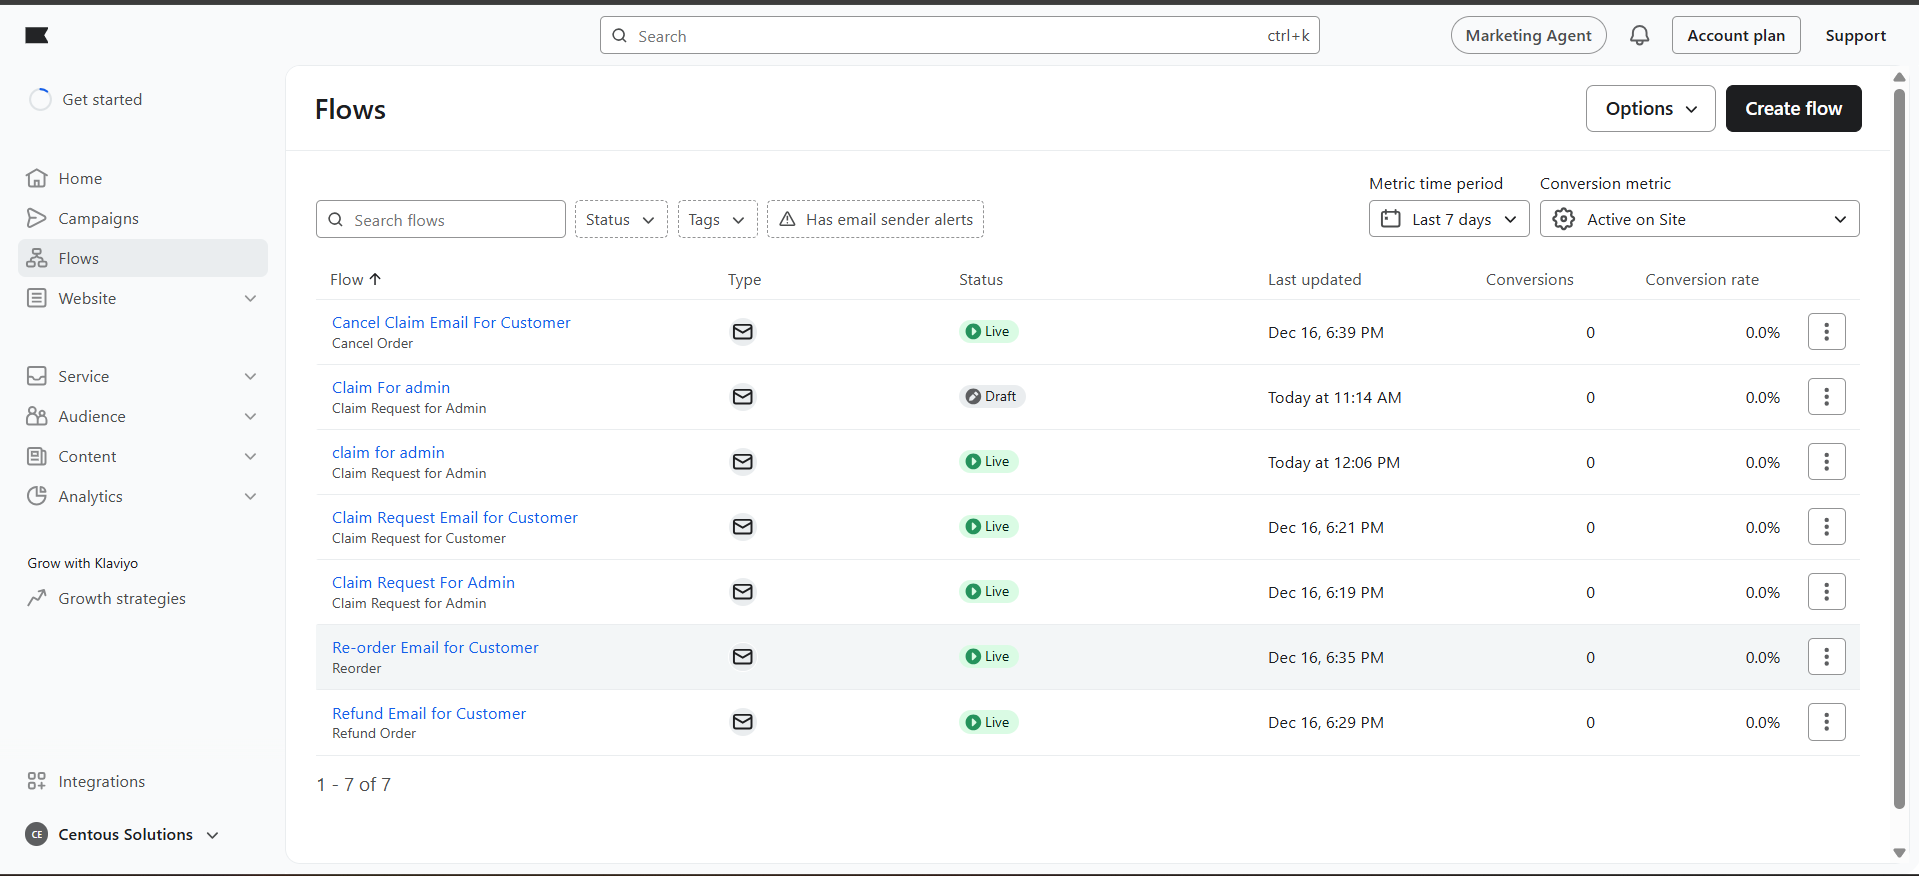
#### **Step 14: You will see your process and flow here.**
* You can create multiple flows here.
* You can also make changes in the flow by clicking the edit button.
* You can also monitor which flow is live and which is not currently.

.png?alt=media&token=f0ea8c8b-3c89-49ae-8a07-af1aa1163ce7)